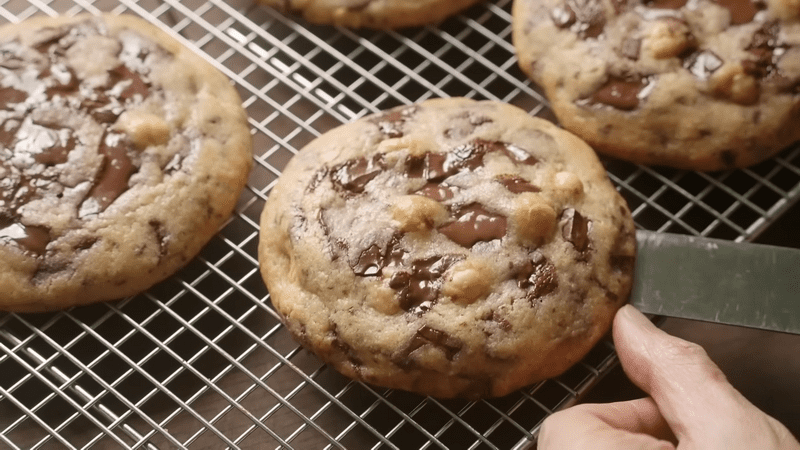
These classic chocolate chip cookies are a must-try for any cookie lover! Soft on the inside, slightly crisp around the edges, and loaded with rich, melty chocolate chips, this recipe will give you bakery-quality cookies right from your kitchen!
Perfect for dessert, a snack, or even dunked into a glass of cold milk, these cookies are sure to impress. Follow this guide to bake chocolate chip cookies like a pro.
Classic Chocolate Chip Cookies Recipe
Equipment
- 1 Mixing bowls one large, one medium
- 1 Hand mixer or stand mixer optional, but recommended
- Measuring cups and spoons
- 1 Baking sheet
- 1 Parchment paper or silicone baking mat
- 1 Cooling rack
- 1 Cookie scoop or tablespoon
Ingredients
- 2 1/4 cups all-purpose flour (280g)
- 1 tsp baking soda
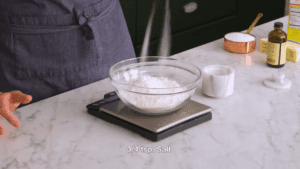
- 1/2 tsp salt
- 1 cup unsalted butter (226g) , softened
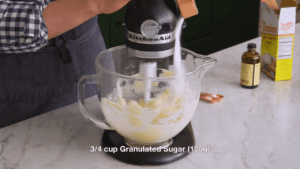
- 3/4 cup granulated sugar (150g)
- 3/4 cup brown sugar (160g), packed
- 2 tsp vanilla extract
- 2 large eggs
- 2 cups semi-sweet chocolate chips (340g)
- 1 cup Optional: chopped nuts (walnuts or pecans)
Instructions
- Preheat the OvenPreheat your oven to 350°F (175°C). Line a baking sheet with parchment paper or a silicone baking mat.
- Mix Dry IngredientsIn a medium bowl, whisk together the flour, baking soda, and salt. Set aside.
- Cream Butter and SugarsIn a large mixing bowl, use a hand mixer or stand mixer to cream together the softened butter, granulated sugar, and brown sugar until light and fluffy—about 3-4 minutes.
- Add Eggs and Vanilla Beat in the eggs one at a time, followed by the vanilla extract, mixing until fully incorporated.Tip: Ensure the butter and eggs are at room temperature for easier mixing and a smoother dough.
- Combine Wet and Dry Ingredients Gradually add the dry ingredients to the wet mixture, mixing on low speed until just combined. Be careful not to overmix.
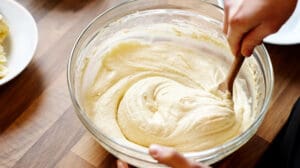
- Fold in Chocolate ChipsGently fold in the chocolate chips (and nuts, if using) with a spatula or wooden spoon.Tip: For thicker, chewier cookies, chill the dough in the fridge for at least 30 minutes before baking.
- Scoop the DoughUse a cookie scoop or tablespoon to drop rounded balls of dough onto the prepared baking sheet, spacing them about 2 inches apart to allow for spreading.Tip: Sprinkle a tiny bit of sea salt on top of the cookies before baking for added flavor.
- BakeBake for 12-15 minutes, or until the edges are golden brown and the centers are still soft. Rotate the baking sheet halfway through for even baking.Tip: Slightly underbake for a gooey center. The cookies will continue to set as they cool.
Video
Notes
Nutrition
Nutritional Information (per serving):
- Calories: 210
- Carbohydrates: 28g
- Protein: 2g
- Fat: 10g
- Saturated Fat: 6g
- Cholesterol: 30mg
- Sodium: 115mg
- Fiber: 1g
- Sugar: 18g
Storage and Freezing Tips
Freezing cookie dough is ideal for baking only what you need, especially when you want freshly baked cookies without extra prep. Here’s a detailed guide to freezing chocolate chip cookie dough:
- Scoop and Shape the Dough: Roll the dough into individual balls, about the size you’d typically bake. This step is essential for easy portioning once frozen. I recommend using a cookie scoop to keep the dough balls uniform, which ensures even baking later on.
- Freeze Dough Balls Individually: Line a baking sheet with parchment paper, and place the dough balls in a single layer, leaving a small space between each one. This prevents them from freezing together, making it easy to remove just a few at a time. Freeze the tray for 1-2 hours, or until each dough ball is fully frozen and firm to the touch.
- Transfer to a Freezer Bag or Airtight Container: Once frozen, place the dough balls in a resealable freezer bag or airtight container. Squeeze out as much air as possible before sealing to prevent freezer burn, which can dry out the dough. Label the bag with the date and baking instructions for easy reference.
- Bake Straight from Frozen: When you’re ready to bake, place the frozen dough balls on a lined baking sheet and bake at the usual temperature, adding an extra 2-3 minutes to the baking time. Baking from frozen maintains the dough’s texture, giving you thick, chewy cookies without the hassle of defrosting!
Can You Freeze Chocolate Chip Cookies After Baking?
Absolutely! Freezing already-baked cookies is perfect for when you want to enjoy your cookies later without baking each time. Let the cookies cool fully before freezing. This prevents condensation, which can make cookies soggy when they thaw.
To prevent the cookies from sticking together, layer them with parchment paper in an airtight container or freezer-safe bag. You can also wrap each cookie individually with plastic wrap for maximum freshness, especially if you’re stacking them in a container.
For best results, use an airtight container or freezer bag, removing as much air as possible. This keeps freezer burn at bay, preserving the cookie’s taste and texture. Properly stored, cookies will stay fresh in the freezer for up to 3 months.
*When you’re ready to eat, let the cookies thaw at room temperature for 15-20 minutes. For that fresh-from-the-oven warmth, pop them in a 300°F oven for about 5 minutes to revive the gooey texture.
How to Make Thicker Chocolate Chip Cookies
Thick, bakery-style cookies are a dream—soft in the middle with a nice rise and structure. For those impressive, thick cookies, these steps will get you there:
Start with Cold Butter
Instead of softened butter, use butter straight from the fridge, cut into cubes. Cold butter doesn’t melt as quickly in the oven, which slows spreading and keeps cookies thick and tall. You may need to mix a bit longer for the butter to combine, but it’s worth the effort!
Chill the Dough
Even if you’re using cold butter, chilling the dough is a must. Chill the dough for at least 30 minutes or, even better, an hour. Chilling helps firm up the fats and solidifies the dough, making it less likely to spread during baking. For ultra-thick cookies, try chilling the dough overnight!
Add a Bit More Flour
If you’ve noticed your cookies spreading too much, add an extra 1-2 tablespoons of flour to the dough. This provides additional structure, helping cookies retain thickness without losing that soft texture.
Scoop Tall Mounds
When portioning dough onto the baking sheet, form taller, cylindrical shapes instead of round balls. Taller mounds encourage upward expansion instead of outward spread, giving you thicker cookies with a soft center.
If You Don’t Have Time to Chill the Cookie Dough…
Life gets busy, and sometimes you just want cookies now. If you can’t spare the time to chill the dough, here are some tricks to get a similar result:
- Add Extra Flour: Increase the flour by about 1-2 tablespoons. This quick fix helps the dough hold shape better and spread less during baking.
- Use a Higher Oven Temperature: Bake the cookies at 375°F instead of the typical 350°F. The higher temperature sets the edges faster, preventing too much spreading and preserving thickness.
- Shape the Dough Taller: When placing the dough on the baking sheet, form each piece into a slightly taller mound. This prevents the dough from flattening out too much as it bakes.
How to Make the Cookies Chewy
For that perfect combination of crispy edges and chewy centers, certain ingredients and techniques make all the difference:
Use More Brown Sugar
Brown sugar is key to chewy cookies due to its moisture content from molasses. A higher brown-to-white sugar ratio adds chewiness and depth of flavor. I recommend using 1 ¼ cups of brown sugar to ½ cup of white sugar for chewy perfection.
Add an Extra Egg Yolk
Egg yolks add richness and structure, creating a chewier texture. Try using one whole egg and an additional yolk for a softer, chewier result without making cookies cakey.
Underbake Slightly
Remove cookies from the oven when the centers still look a bit underdone. They’ll continue to set as they cool, giving you that perfect gooey center and chewy texture.
Melt the Butter
Using melted butter can enhance chewiness by adding moisture, but it can also cause more spreading. To offset this, melt the butter, let it cool to room temperature, and chill the dough before baking to control the spread.
Use Bar Chocolate Instead of Chocolate Chips
Chocolate chips are designed to hold their shape, so they don’t melt as smoothly in cookies. Bar chocolate, on the other hand, melts more evenly, creating those gooey chocolate pockets that make each bite memorable.
Also, when you chop a chocolate bar, you get a mix of small shards and large chunks. The shards disperse throughout the dough, giving more chocolate flavor in every bite, while the larger chunks create decadent, melted pools of chocolate on the surface.
Switching from chips to bar chocolate can make cookies feel richer, more luxurious, and satisfyingly gooey—perfect for anyone who loves a chocolate-forward cookie.
In Summary
Baking chocolate chip cookies like a pro isn’t as hard as it seems. With a few key techniques and a little practice, you’ll be able to turn out perfectly soft, chewy, and delicious cookies every time. Don’t be afraid to make the recipe your own—add different ingredients, tweak the baking time to get the texture you like, and most importantly, have fun with it.


